In this piece we’ll review help defense and offer three tricks of the trade that help defenders must master.
Line Rules

In the diagram above, X3 is the help defender.
Line Rule: If you are two or more passes away and the ball is above the free throw line, get on the lane line.
This is reflected in the featured image of Villanova atop this article as well.
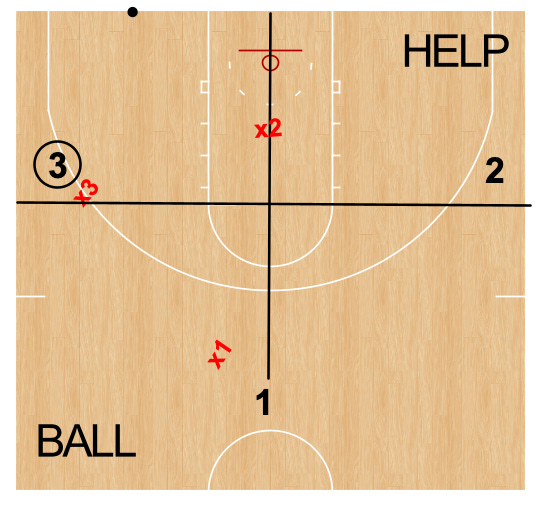
In the diagram above, X2 is the help defender.
Line Rule: If you are two or more passes away and the ball is at or below the free throw line, get on the midline.
The ball is a more imminent threat to the rim now, so deeper help is warranted.
Covering Down
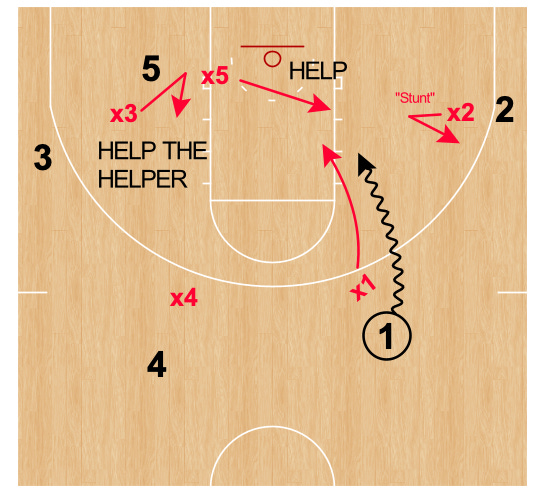
X1 is beat off the dribble and Player 1’s drive threatens the rim. X5 helps over and X3 must help the helper by covering down.
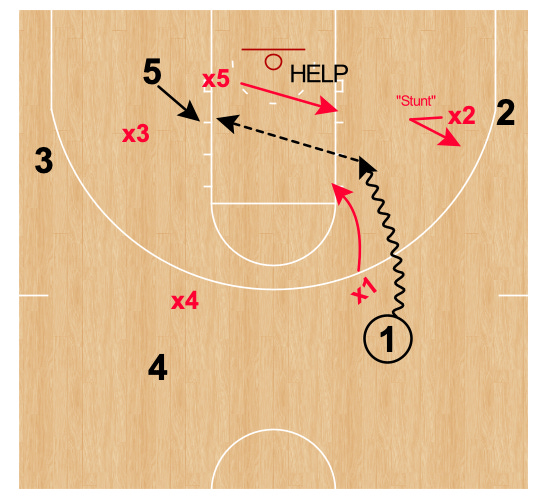
Failure to cover down can result in an easy drop pass to the post (Player 5 above). A good cover down can result in a steal as Player 1 passes when Player 5 “looks” open, but X3 covers down to steal it.
We also need X3 to cover down so they can block out Player 5 should the driver shoot!
Help Side: Invert Call
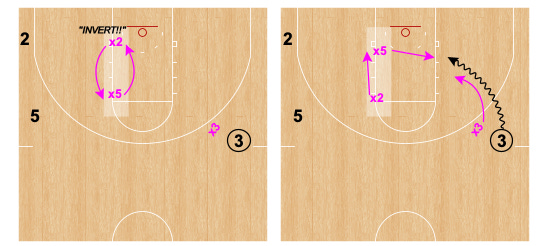
In Frame 1 above, X2 finds themselves in the Low I help position. A bigger X5 is above them. X2 makes an invert call and the two players switch positions.
Now when Player 3 mounts their drive, we have more size helping over and X2 covering down.
Help Side: Sticking Cutters
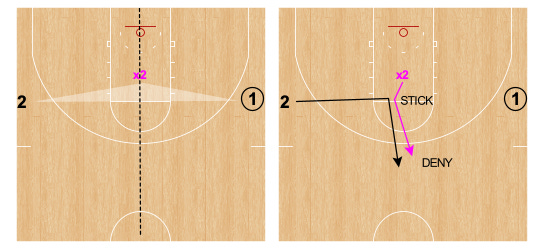
Frame 1 – X2 following line rules, two passes away and on the midline with the ball at/below the free throw line.
Frame 2 – Player to attempts to flash across X2’s face and is met with an arm bar (stick). X2 then denies the pass to the swing spot on top of the offense.
The key here is never let your man cross your face. Stick then deny. They have moved from two or more passes away to one pass away.
The complete defense has good on-the-ball, one pass away and help side defense. They all work in conjunction. These tricks of the trade are all skills that go into being a good help side defensive team.
